Wednesday, July 29, 2009

My Little Secret

Still working on my big picture scrapbooking class here. This week we had to scrapbook a picture of ourselves looking at other peoples view of us. I have had the picture I had chosen for 12 years now and haven't done anything with it. I've known I wanted to scrapbook it but not how. Well this class gave me the answer. To scrapbook it looking at what other people saw and how they didn't know everything. When this picture was taken I was a young executive manager working for a telecommunications company as the commercial manager for China. They would have liked me to move and work in the China office but I couldn't do that but at one point I spent 6 weeks there. The plan was I would continue to work my way up the promotions until I became director. I was working on my MBA and it was all mapped out. But they didn't know everything about me and what I wanted. I didn't know how much this secret would change me as I had every intention of going back to work.

A great tip from the class was not to adhere the layer papers right to the edge so you could slide things under it if you wanted later - which I did. But also once applied I was able to get the paper edge damp and then roll them to add more to the distressed look. I also sanded the edges of the picture.

Lots of sewing as I finally got round to getting my sewing machine set-up in my room. Now I have more space as I've moved out all the CTMH paperwork that took up so much space my plan is it will stay out all the time. I had fun sewing on this page and I think it added a little. The very back paper was very bright for the page so I toned it down using ink.

Photobucket

When the page was finally finished. I took a picture and then I realised I had a mistake - a typo. We've all been there. Come times for a creative addition. I think it works well - adds an highlight to the work My - as it was my secret. I'd prefer it without but I wanted to share that we all sometimes do this. All a did was print that work again cut it out. Glue and go round with the brown pen. Now it would have worked better if the 'l' of little wasn't so close but its better than it was!

Photobucket

Thursday, July 23, 2009

I must be missing the dance studio

So last night I dreamed that they created a special part for me in this years nutcracker performance in a new circus scene. It was all so real. I really must be missing our near daily visits to the dance studio. Its a good job we start dancing again on Monday morning.
Many of the "big girls" (well that's their name at our house although how a ballet dancer can ever be described as big I don't know) have been away from home this summer at summer intensive across the world (yes a couple went to Paris!). So they got some mail while away I have made a number of cards. I have had so much fun recently though with my ballerina legs stamp which I got from Eclectric Paperie.
Here are 2 of my favorites - recognise the tutu skirt?? If not go back a couple of posts and you may notice this on one of my layouts. It was lying around on my desk and I suddenly realised that it would make a great skirt for the tutu. (Sorry there is a smudge on the sticker on the card - photographs show things eyes miss).


I have the vision of a scrapbook page with a whole line of these legs across the bottom, now just to find the correct picture to go with it.

Have a great day - and watch out you never know I may make by dancing debut this November as a "photographer" in the nutcracker......

Sunday, July 19, 2009

Memories of Christmas Past

This weeks assignment for my Big Picture Scrapbooking class was to make a mini album about a holiday but to journal from a different view point than you would normally. I have to admit I'm not really into mini albums because I like all my layouts in one place. The only reason I can see for them is gifts so I passed on the mini album idea and just did a layout.

The holiday I chose was Christmas 2008. We didn't have very many good pictures from this Christmas. I'm not sure what happened but when I looked at what we had I saw all these pictures of the crazy present opening that goes in our house and it made me think of the Christmases I used to have we were growing up. They were the complete opposite. You had to wait patiently for the time to come to open gifts. When my Granny came we even had to wait until after the Queens Christmas message which was about 3pm in the afternoon. Very English I know watching the Queen give her yearly message. It even got me to thinking about how my grandma would make us open the presents very carefully to preserve the paper - she would carefully go through it all and fold it ready for next year. I'm sure we had pieces which had been used for 5 years at least. I guess it was from living through the war that she was very concerned about conserving things.

For the layout I found some cute Christmas paper in Michaels which I wanted to work with. It had the tradition reds and greens but also some blue tonnes which I was able to match with juniper and crystal blue from the CTMH palette. The red glittery letters matched some of the red glittery writing in the paper so I had to have that as well, good job I had my coupon for those. I don't know how they justify charging me $6 for some sticker letters. At least at 50% there were a little less. I made the white glittery letters. They are CTMH chipboard letters. I covered them in liquid glass (CTMH liquid glue) and sprinkled with prisma glitter. The white letters on the paper were also glittery so these match well even though you may not be able to see the glitter in the paper. If you do this just remember to be patient and letters the glue dry for several hours. You can also color the letters before you do the glue and glitter to make colored glitter chipboard letters. Much cheaper than how much they charge in Michaels and such. Plus you only do the letters your using so the other letters can be saved for another project and made to match that layout. Ways to color chipboard letters include :-
- direct ink to paper technique
- paint
- re-inkers
- stamp them (I love to do this after I have done a base color to give some texture)
- stickles
plus I also have some creme rub on stuff which I've had for ages. It doesn't have a name or anything on it. All I know is I paid $4 for it. But it works really well.

Thursday, July 16, 2009

Birthday Layouts - from an alternative angle

Currently signed up for another big picture scrapbooking class. I have to say I love taking these classes as they make me scrapbook and push me to try new ideas. The one I'm taking at the moment is called Point of View and its about looking at those events we have every year to scrapbook but journaling about them from a different angle than you would normally. This weeks was birthdays. Usually we write about the birthday party and the guests and we do it every year without fail well in this class its about looking beyond the obvious. Week 1 was an assignment for a birthday party picture - well with 2 kids I have 2 birthdays to do each year and the last 2 birthdays hadn't been done so I had the material to do it. (The other benefit of the class is now I've done those pages - yeh me....).
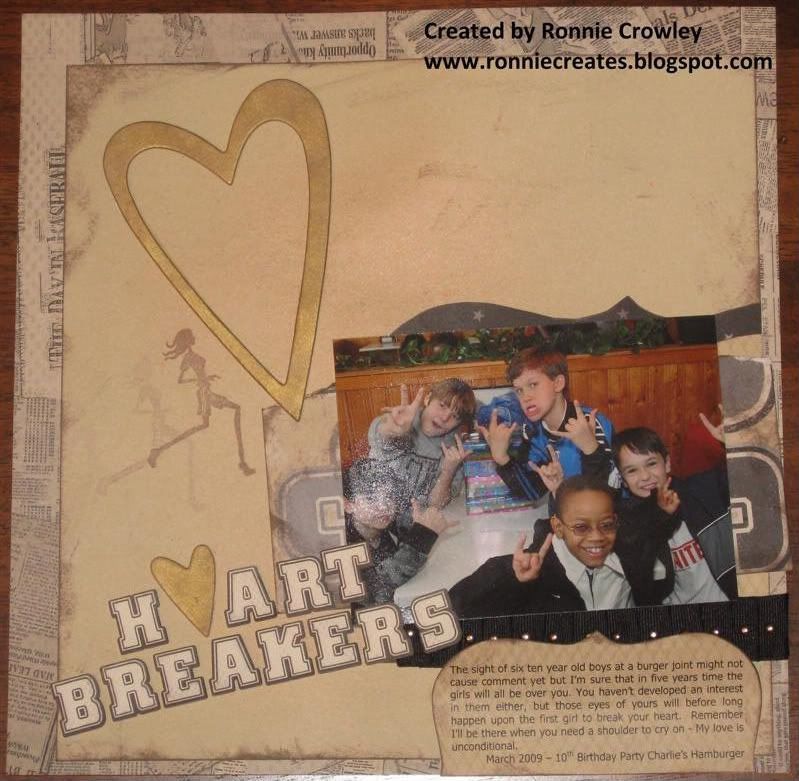
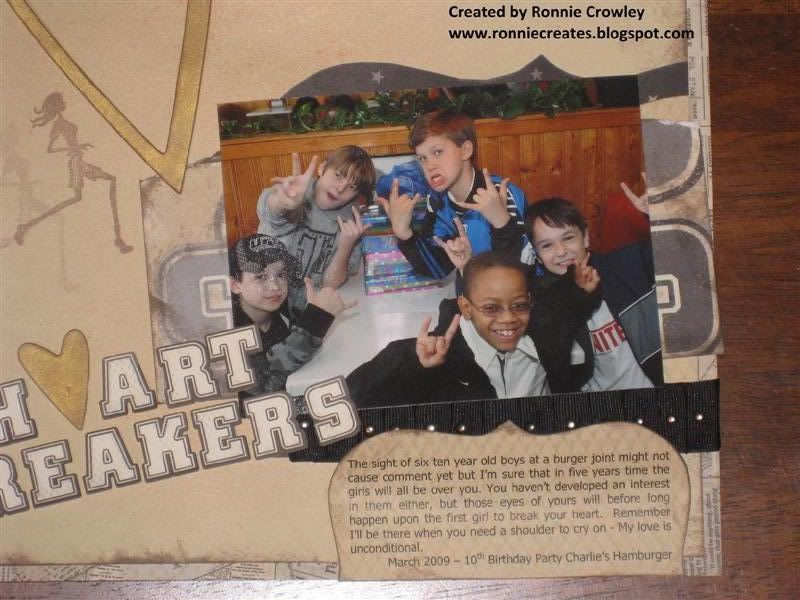
Firstly Philips 10th birthday - when I look at the pictures I saw these boys who were just a few years off becoming objects of desire to girls. So I decided to focus on this.

Photobucket

<span class=Photobucket" border="0">

All supplies used are CTMH other than the ribbon. The title is letter stickers but they have been mounted on foam tape to give dimension. The ribbon was pleated and brads used to hold the pleats to give texture to the layout as well. I cut the bracket shapes by finding a shape online printing it at the size I needed and using as a template.

For Eleanor's birthday I focused on the fact she's growing up and become more aware of the cost of everything. Her hobbies are way more expensive than Philp. This last year she wanted to dance in a competition which with out the extra lessons needed was going to cost several $100s. In total for the less than 3 minutes she was on stage it cost in excess of $400 - could even be $500 but I don't want to think about that. So she exchanged her birthday party to cover part of that. In the end she had a dance rehearsal on her actual birthday so we couldn't even have a birthday dinner at home so we brought pizza and cake to the studio for everyone after rehearsal!

Photobucket

Photobucket

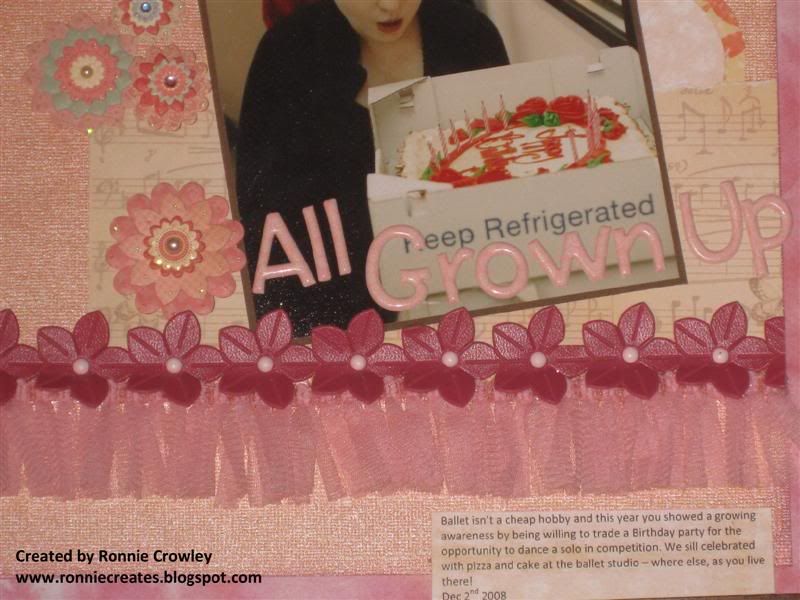
All the supplies are from Jo Annes - the paper is from a variety of companies. My favorite part of this layout is the flowers and trim at the bottom. I was looking for a way to add texture and dimension to the layout and couldn't find anything in the scrapbooking supply area so headed over to the trims in the sewing section. I found the flowers which were a perfect match in color. They are made of a vinyl type material. Then I came across the netting edging stuff and they worked together and so ballet that I had to have them. (Don't tell Anthony but combined they cost me $6 for enough to do the layout) When I was working on the layout I realized I could put brads through the holes in the flowers to add something else and this is what we got. I love it. Eleanor was worried when I bought these things for her page but now she's seem it together she agrees that I did know what I was doing.

Well I'm off now to read assignment 2 for next week looks like its holiday pictures - I can see Christmas in July may be. I will have to see what I can find that I need to scrapbook.
Have a great day and stay cool if your in Texas.

Sunday, July 12, 2009

Hey There Cupcake

Well after a very stressful week and a major change in life I decided it was time to get creative again. For those who just read my blog this last week I resigned as a CTMH consultant for a number of reasons which I don't need to go into here but this means my blog will change slightly. I will be able to use more none CTMH products more freely but don't worry I will still be using plenty of them as they are my no.1 stamping company. I hope to work on posting more tutorials and things on my blog. With product reviews and you never know I may even get into making my own video tutorials, if my daughter will loan me her video camera!

So that all being said my project today was cupcakes. Cupcakes are huge in scrapbooking and I love the set from CTMH called cupcake sprinkles (D1336). I have though been having issues with the icing on the cupcakes not looking yummy enough for me. That was until I was wandering around blogging world and came across someone using dimensional paint (sorry I can't remember where I tried hard to find the blog again but failed. I was sure I had booked marked it). So I went to Michaels and after a 10 minute search I found my paint hiding in the paint section near the spray paints. Just so you know what it looks likes here's a picture - I always find it easier when I know what something looks like.


I took the frosting stamp and using a light ink color I stamped the image on white card stock. Then I took the tube of paint and squeezed out a pea size blob of the paint and using a paint brush moved the paint around to cover the image and to look like icing looks of cupcakes, you know what I mean. To add sprinkles just drop some small seed beads of the color of your choice into the paint and gently press into the paint. I then left it to dry. The amount of time it takes will depend on how thick you make the paint but a couple of hours should see it dry to touch. I found that the card stock was the last thing to dry completely. When the whole piece was dry I careful cut out the image.


To complete my cupcake I stamped the cupcake case and cut this out. I mounted the frosting flat on the card but used foam tape behind the cupcake case to give the dimension I needed to make the finished cake look more realistic.


The final card is below. It's in the mail now to one of my daughters dancer friend who is away at a summer intensive. I hope she likes it. I had fun and I see more cupcakes in my future! At least these ones don't result in the extra pounds.

Wednesday, July 1, 2009

Interactive Pages in Your Scrapbook

With the 4th of July coming up I know you will have a lots of pictures from the one day and I know from my vacation we took about 4000 pictures over 3 weeks so I have plenty of pictures to scrapbook. The latest product from CTMH to help us is the Flip Flaps Memory Protectors - which are $3.95 for 15 flaps or enough to add another 30 pictures to our pages! They attach direct to your page protector and you can make little flap albums with you then add.
One of my favorites among the CTMH Consultant Tresa Black has made a great UTube to show you how to do it. She is so talented at these videos. So check out how she uses the flip flap memory protectors. In addition she shows you how to add a 9 by 9 page protector to your 12 by 12 album page to give you another 2 9 by 9 pages of spaces to add pictures. There is no need any longer to have multiple pages of one event and you don't have to leave any of those precious pictures out. You can buy both of these products direct with me or via my website at www.ronnie.myctmh.com. Watch out for some pages from me where I've used these products coming soon. Just got to finish getting everything put away after the vacation.

Check it out here :-